Look-and-Feel and APIs
The way in which entities are visualized can be configured via the "Viewing Options" dialog in both the Admin UI and the Kiosk UI.
It is possible to configure these viewing options via URL parameters as well. Additionally, the visualization of entities can be completely switched off based on different criteria. This is especially helpful in scenarios where there are many objects being tracked, leading to a cluttered and confusing situation.
The "Viewing Options" Window
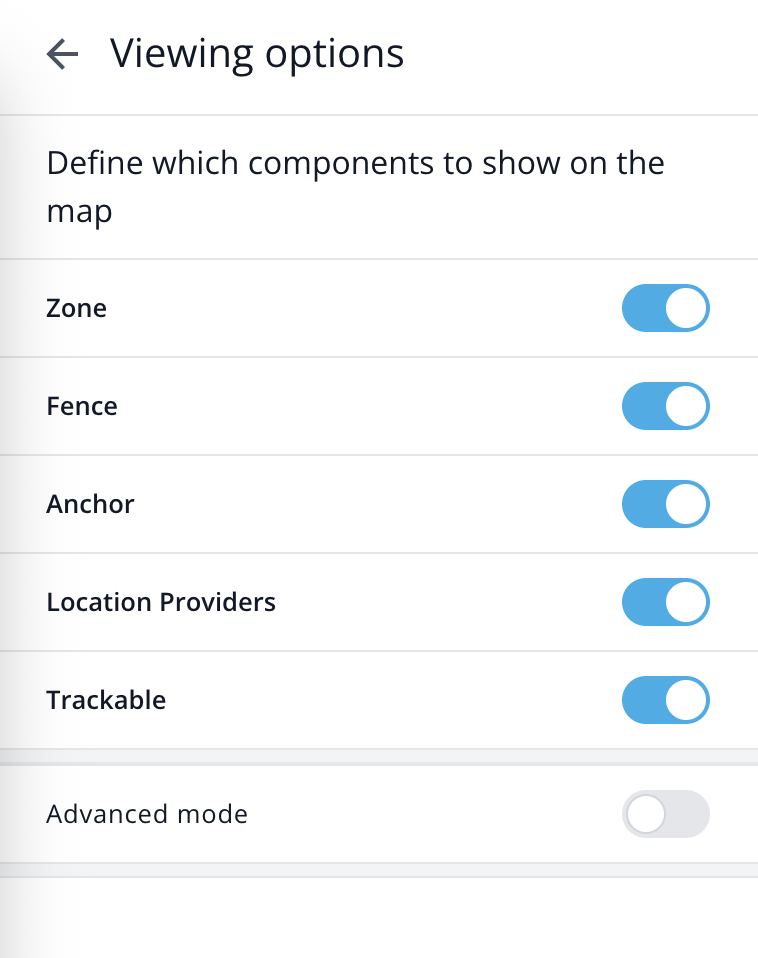
The look-and-feel of the Admin UI and the Kiosk UI can be configured through the "Viewing Options" dialog window. To open this window, navigate to the top right corner of the UI and click this button:
| Viewing Options | Description |
|---|---|
 | Within the "Viewing Options" dialog, you can enable or disable the rendering of location providers, trackables, fences, zones, and anchors. If rendering is enabled, you can switch certain rendering details on or off. These controls are organized in groups, so toggling a group will affect all layers that belong to it. |
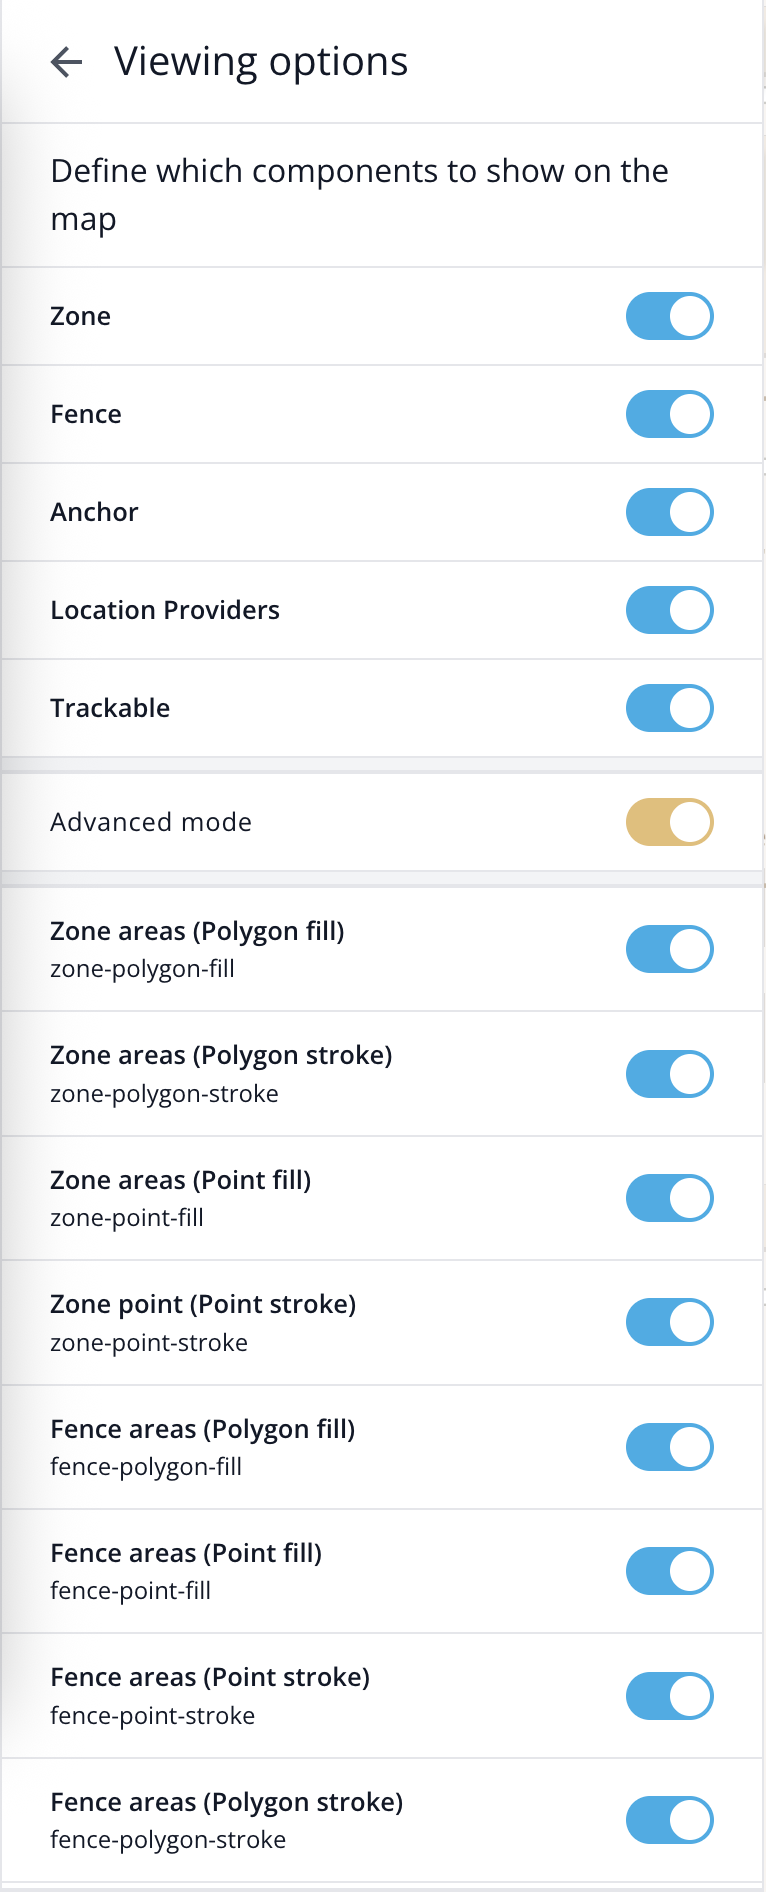
 | When the "Advanced Mode" toggle is activated, a detailed list of individual layers becomes available. This allows you to enable or disable specific layers, providing fine-grained control so you can hide the exact layers you do not need. |
Viewing Options URL Parameters
The layerfilters URL parameter can be used to programmatically set the viewing options.
In "Advanced Mode", you can manage all style layers directly. The layerfilters option provides a list of layers to be excluded from rendering. Any layer included in this list will not be displayed, giving you full flexibility in customizing the map view.
For example, here's how to hide the "Course Indicator" of a location provider:
map/live/show?layerfilters=%5B"loc-markers-course","loc-markers-course-arrow"%5D
Here's how to ensure location providers are not shown at all:
map/live/show?layerfilters=%5B"location-group"%5D
Here's how to filter the visualization of the "course" and the "label" for all location providers:
map/live/show?layerfilters=%5B"loc-markers-course","loc-markers-course-arrow","provider-label"%5D
Do not forget to use the proper escape sequence for special characters! E.g.:
[becomes %5B]becomes %5D
Render only Specific Objects
In certain scenarios, many objects may be tracked simultaneously. Visually displaying all of them on the map could be distracting and confusing. To help with this, the following URL parameters can be set to configure which entities should be rendered and which should not:
- filterid: only render entities with the given id(s).
- filtertype: only render zones and location providers of the mentioned technology type. Can be any type as described e.g. here: REST API documentation for location providers.
- filterobjType: only render entities of the mentioned entity type. Can be
zone,anchor,location,fence,trackable.
All of these parameters accept more than one value. In this case, a comma needs to be used to separate the values.
map/live/show?filterid=d49f0712-dcbd-4cbc-8b4f-c006b8555839

map/live/show?filtertype=uwb,gps

map/live/show?filterobjType=fence,trackable
Pan & Zoom to a Specific Location
There are two sets of parameters to pan and zoom the map to a specific location:
Specifying the longitude and latitude of the location, including the desired zoom level:
- lng: the longitude to which the map should pan.
- lat: the latitude to which the map should pan.
- zoom: the zoom level. Must be in the range [0,24], where 0 corresponds to a zoomed out view of the globe, and 24 corresponds to a detailed, zoomed in view. For more information, refer to MapTiler - our default mapping service provider: Tiles à la Google Maps.
map/live/show?lng=9.5367&lat=49.4055&zoom=9
OR:
- id: pan & zoom to the last known location of an entity with the given id(s).
Multiple values can be specified (they have to be comma-separated).
map/live/show?id=d49f0712-dcbd-4cbc-8b4f-c006b8555839